Impossibly Green Zucchini Cupcakes

For this edition of TFB, I might have gone a bit overboard with the food coloring. If this was Cupcake Wars, I would surely be ousted. Florian Bellanger would not have even tasted this confection because of the level of green color the frosting turned out to have (he is known for his disdain for colored frosting).

Anyways, moving on, I made these on a rainy Saturday when my parents were in town. I wanted to use something other than sweet things in my recipe, and I knew zucchini was a popular choice. I also like spice cakes when the mood is right, so I was all in. I basically consulted my Marta Stewart handbook of cupcakes and followed the recipe there. Nothing really special, other than the green-overload of the frosting.

Image

Sweet Zucchini Cupcakes
(adapted from Martha Stewart)

  • 1 1/2 cups all-purpose flour, (spooned and leveled)
  • 1 cup packed dark-brown sugar
  • 2 teaspoons baking powder
  • 1/2 teaspoon ground cinnamon
  • 1/2 teaspoon salt
  • 1/2 cup coarsely chopped pecans or walnuts
  • 1 zucchini (10 ounces), coarsely grated (1 1/2 cups)
  • 1/3 cup vegetable oil
  • 2 large eggs, lightly beaten
  • 1/2 teaspoon pure vanilla extract
  • Cream Cheese Frosting

Directions

  1. Preheat oven to 350 degrees. Line cups of a standard (12-cup) muffin tin with paper or foil liners. Set aside.
  2. In a medium bowl, mix together flour, brown sugar, baking powder, cinnamon, and salt. Mix in nuts.
  3. In another bowl, combine zucchini, oil, eggs, and vanilla; add to flour mixture, and mix just until combined (do not overmix).
  4. Divide batter evenly among cups. Bake until a toothpick inserted in the center of a cupcake comes out clean, 40 to 45 minutes.
  5. Cool in tin on a wire rack for 10 minutes; turn cupcakes out, right side up, and cool completely. Meanwhile, make frosting. Using an offset spatula or butter knife, spread frosting on cupcakes. The frosted cupcakes are best eaten within 1 day.

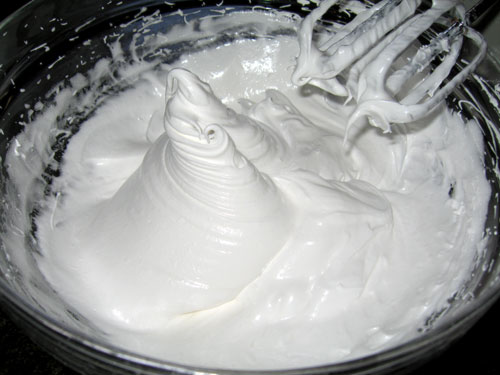
The cream cheese frosting from Martha Stewart is seriously the best recipe I’ve come across, solely because I always seem to make the frosting too gloppy with too much cream cheese. This only adds half of a cup, but the flavor is still very much there, especially against the spiced cake.

Cream Cheese Frosting
(adapted from Martha Stewart)

Ingredients

  • 4 tablespoons room-temperature unsalted butter
  • 4 ounces room-temperature bar cream cheese
  • 2 cups confectioners’ sugar
  • 1/2 teaspoon pure vanilla extract

Directions

  1. In a medium bowl, with an electric mixer, beat butter and cream cheese until smooth. Add confectioners’ sugar and vanilla extract; beat until light and fluffy. Refrigerate until ready to use, up to 1 day.

I don’t know what possessed me to color the frosting, I reckon was just feeling whimsical… but anyways, here’s the final product. Dr. Seuss would be proud.

Image

My first PAID JERB! Pt. 3 of 3

So, this one actually has a very cute story behind it….I was scrolling through recipes on the Cupcake Wars website one day and decided to make a White Russian cupcake when I went to visit my parents that weekend. My parents bought the ingredients and copious bottles of liquor ahead of time.   Unfortunately, because I am a thrill-seeking lush with a penchant for irresponsibility and good times, I was too hungover the next day to attempt these bad boys. It was sad, but I literally couldn’t stomach the smell of all that drank.
 
Bitchin hangover + vodkaKahluaBaileysandcherryliqueur = VOMIT.About a month before the party, my friend emailed asking if I had a good recipe for an “spiked” cupcake for the adults at the party. I hadn’t ever made an alcohol-themed cupcake, specifically, but I immediately thought about all the un-used liquor from my previous attempt sitting in my parents’ liquor cabinet and knew that was it. Strangely, I had to kind of “sell” her on it a bit, but after several re-iterations of “If you want a spiked cupcake, this is as spiked as it gets,” she consented. So raise your glass cuz here it is…
 
White Russian Cupcake
 
This recipe is adapted from Cupcake Wars.
 

Ingredients

  • 2 1/2 cups cake flour
  • 8 tablespoons vanilla instant pudding mix
  • 1 tablespoon baking powder
  • 1/4 teaspoon baking soda
  • 1/2 teaspoon kosher salt
  • 5 whole eggs
  • 2 teaspoons vanilla extract
  • 1 cup milk
  • 1/4 cup half-and-half
  • 3/4 cup butter
  • 1 1/2 cups sugar
  • 3 ounces sour cream
  • 2 tablespoons mayonnaise
  • 1 ounce coffee liqueur (recommended: Kahlua)
  • 1 tablespoon mocha paste
  • Irish Cream Filling (recipe follows)
  • 12 ounces Irish Buttercream (recipe follows)
  • Vodka

Directions

Preheat the oven to 300 degrees F. Prepare a cupcake pan with 24 cupcake liners.

Combine the cake flour, pudding mix, baking powder, baking soda, and salt in 1 medium bowl. Crack the eggs into a second bowl and add the vanilla extract. Measure the milk and half-and-half into a third bowl. In a 5-quart mixer with a paddle attachment, cream the butter until fluffy. Stop the mixer and scrape down the sides with a spatula. Turn the mixer on first speed, add the sugar, and mix until fluffy. Add the eggs 1 at a time. Scrape down the bowl. Add the sour cream and mayonnaise and incorporate completely. Scrape down the bowl. Add the dry ingredients, alternating with the wet. You will start and end with the dry ingredients. Mix the coffee liqueur and mocha paste into the batter until smooth and no lumps are present.

Using a 2-ounce ice cream scoop, scoop 2 ounces of batter into the cupcake liners. Bake for 18 minutes. Insert a skewer into the cupcake, if it comes out clean they are ready to be removed from the oven. Let cool for 20 minutes.

Scoop out the center of the cooled cupcakes with a melon baller. Fill a piping bag with Irish Cream Filling and cut a small hole at the end of the bag to allow the filling to be piped into the hollowed out center of cupcake. Fill all the cupcakes with about 1/2 ounce of filling.

To assemble: Place a round tip # 809 into a large piping bag. Fill the piping bag with Irish Buttercream. Generously pipe about 1 ounce buttercream onto each cupcake. Garnish each cupcake with 4 or 5 small chocolate pearls and a chocolate cigarette. Mix equal parts gold dust with vodka to make an edible gold paint. Using a small round brush, paint the ends of the chocolate cigarettes. The edible paint will dry leaving behind the gold dust.

Irish Buttercream:

  • 4 pounds butter, softened
  • 8 ounces high ratio shortening (recommended: Sweetex)
  • 8 cups confectioners’ sugar, sifted
  • 4 tablespoons vanilla extract
  • 2 tablespoons lemon extract
  • 1 tablespoon mocha paste
  • 4 tablespoons cherry liqueur
  • 2 ounces Irish liqueur (recommended: Bailey’s Irish Cream)
  • 1 1/2 ounces coffee liqueur (recommended: Kahlua)
  • 1 tablespoon vodka

In a 5-quart mixer with the paddle attachment, cream the butter and shortening together. On first speed, add the sifted powdered sugar to the bowl in 3 parts. Let each part incorporate into the butter mixture before adding the next. After adding all the sugar, put the mixer on the fourth (highest) speed and mix for 8 to 10 minutes. The buttercream will begin to gain volume and look white and fluffy. Once you bring the buttercream to full volume, add the extracts and the mocha paste. Lastly, add the liqueurs and vodka and incorporate completely.

Irish Cream Filling:

  • 8 ounces heavy cream
  • 4 ounces Irish liqueur (recommended: Bailey’s Irish Cream)

In a 5-quart mixer with the paddle attachment, add the heavy cream and whip to full volume. Add the Irish liqueur and, on first speed, fold in the liqueur until completely incorporated.


When it was all said and done, the cupcakes turned out awesome and everyone loved them!


My first PAID JERB! Pt. 2 of 3

Continuing the fun of my first ever paid cupcake catering job….

My friend specifically requested this cupcake after seeing my pictures from a previous baking episode in which I made these. She had been dead set on having them, and insisted that these be in the repertoire. They’re really simple and quite tasty. I use more than the recommended amount of cherry juice, just because I want as much cherry flavor as I do almond flavor.

Cherry-Almond Vanilla Cupcakes

Ingredients

  • 1/2 cup butter
  • egg whites
  • cups all-purpose flour
  • teaspoon baking powder
  • 1/2 teaspoon salt
  • 1/4 teaspoon baking soda
  • 3/4 cup buttermilk or sour milk*
  • 1/3 cup maraschino cherry juice
  • 1 1/2 cups sugar
  • teaspoon vanilla
  • 1/2 teaspoon almond extract
  • 12 maraschino cherries, halved
  • recipe Cherry-Almond Butter Frosting
  • Maraschino cherries with stems (optional)
    Directions

    1. Allow butter and egg whites to stand at room temperature for 30 minutes. Meanwhile, line twenty-four 2-1/2-inch muffin cups with paper bake cups (or coat with cooking spray). In a medium bowl stir together flour, baking powder, salt, and baking soda. In a 2-cup glass measuring cup combine buttermilk and cherry juice; set aside.

    2. Preheat oven to 350 degrees F. In a large mixing bowl beat butter with an electric mixer on medium to high speed for 30 seconds. Add sugar, vanilla, and almond extract; beat until combined. Add egg whites, one at a time, beating well after each addition. Alternately add flour mixture and buttermilk mixture to beaten mixture, beating on low speed after each addition just until combined.

    3. Spoon batter into prepared muffin cups, filling each about two-thirds full. Use the back of a spoon to smooth out batter in cups. Press a cherry half into batter in each cup.

    4. Bake for 15 to 18 minutes or until tops spring back when lightly touched. Cool cupcakes in muffin cups on wire racks for 5 minutes. Remove cupcakes from muffin cups. Cool completely on wire racks.

**EDIT: Instead of just using a half of a cherry, I chopped up a good handful and stuffed them into the batter-filled cups before baking them. This gave the batter a bit more cherry juice as well as more crunch and flavor from actual cherries throughout the cake.

Cherry-Almond Butter Frosting
Ingredients

  • 1/2 cup butter, softened
  • cups powdered sugar
  • tablespoons maraschino cherry juice or milk
  • 1/2 teaspoon almond extract
  • Milk
DirectionsIn a large mixing bowl beat butter with an electric mixer on medium speed until smooth. Gradually add 1 cup of the powdered sugar, beating well. Beat in maraschino cherry juice and almond extract. Gradually beat in additional powdered sugar. If necessary, beat in additional juice or milk, 1 teaspoon at a time, until frosting reaches spreading consistency.Using a pastry bag fitted with a large star tip, pipe Cherry-Almond Butter Frosting over tops of cupcakes. If desired, top with cherries. Makes 24 (2-1/2-inch) cupcakes.

 Recipe adapted from Better Homes and Gardens
[pictures to come on next post…]

My first PAID JERB! Pt. 1 of 3

Ok, about the multi-part posts, all I can say is that…

I have TLDR fear.

What is that? “Too Long, Didn’t Read.” It’s a very rational, very substantial fear I have of writing a long entry or post and someone skipping the entire thing because it was too long to care to read through. Okay, whatever, it’s a geeky forum posting  thing, I guess… my nerd is showing, I apologize  -____-

NEWAYZZZ……..

Recently, I was asked by a friend of mine from high-school to make cupcakes for her son’s birthday party. Now, I generally don’t like to get paid to make cupcakes because:

a) I do it because I love it, not because I want it snowballing into a business, and,
b) The last and only other time someone asked me to cater cupcakes for their child’s birthday party, they cancelled a week after we had agreed on everything, and I had already bought the supplies for it, and ended up being out about $40+ bucks.

But I decided she was good for it, so I agreed.

She wanted 50 cupcakes in 3 different flavors: Vanilla Funfetti, Cherry Almond Vanilla, and White Russian. I knew it would be tough, considering I had never made that many cupcakes at one time, much less split up into 3 different flavors. To make things that much more difficult, I was going to have to travel 4 hours home to cater the cupcakes, so there was definitely some planning to be done ahead of time. I knew I had to start strategizing how I was going to do everything in time for the party, but not too far in advance. About 4 or 5 days beforehand, I divided all of the dry ingredients for each recipe into bags and labeled them according to their recipe. The party was on Sunday, so on Friday night I made the vanilla cakes (only the cake, not the frosting), then spent all day on Saturday baking the other 2 cake flavors and all of the frostings.

Here are the respective recipe walk-throughs:

Vanilla Funfetti

I chose this classic cupcake for several reasons. Primarily, I mentioned in one of my very first posts that this vanilla cupcake recipe is my very favorite. It’s rich, sweet, and seriously hard to eff up.

Secondly, it’s “clean.” Originally, I had suggested doing both a vanilla/vanilla and a yellow cake/chocolate icing flavor, however, my friend, thinking ahead with her motherly instincts, nixed that due to the visions of children, parents and the museum they would be celebrating at, covered completely in chocolate frosting. This kind of oversight is precisely why I am not a mom. So we just stuck with plain vanilla for the kids.

Lastly, it’s really easy to amp it up to kid-status. I added multi-colored jimmies to the batter for the carefree, colorful whimsy that is the “funfetti” cupcake.

The Intrepid, Resourceful Baker

This is my Christmas post…

And last of 5 posts in 1 day…

…..I’ll give you a minute to judge me for having no life……

Ok, cool.I titled it this way because I concocted a very neat cupcake whilst being both unafraid of failure and running out of key ingredients.

A friend of mine requested an “Almond Joy-ish” cupcake with an added flavor of coffee. I’ve never made a coffee cupcake before and I was excited to throw something together like that. Lucky for me I happen to be reading my mom’s Better Homes and Gardens magazine which featured several cupcake recipes, one being a Coconut-Pecan cupcake. I took this recipe, and adapted it a little to factor in the coffee element.

Coconut-Pecan-Coffee Cupcakes

(adapted from Better Homes and Gardens)

Ingredients

  • 1/2 cup butter, softened
  • 1/2 cup shortening
  • 2 cups sugar
  • 5 large eggs, separated
  • 1 tablespoon vanilla extract
  • 2 cups all-purpose flour
  • 1 teaspoon baking soda
  • 3/4 cup + 1 tbsp buttermilk
  • 1/2 cup brewed coffee (more or less depending on strength and degree of desired flavor)
  • 1 cup sweetened flaked coconut
  • 1 cup finely chopped pecans, toasted

Preparation

  1. 1. Beat butter and shortening at medium speed with an electric mixer until fluffy; gradually add sugar, beating well. Add egg yolks, 1 at a time, beating until blended after each addition. Add vanilla; beat until blended.
  2. 2. Combine flour and baking soda; add to butter mixture alternately with buttermilk and coffee, beginning and ending with flour mixture. Beat at low speed just until blended after each addition. Stir in coconut and pecans.
  3. 3. Beat egg whites at high speed until stiff peaks form, and fold into batter. Place 36 paper baking cups in 3 (12-cup) muffin pans; spoon batter into cups, filling half full.
  4. 4. Bake at 350° for 18 to 20 minutes or until a wooden pick inserted in centers comes out clean. Remove from pans to wire racks, and let cool completely (about 45 minutes).

Because I don’t generally bake with coffee in any form, ever, I held back a little on my use of it. I also didn’t know how strong to brew it, but, as coffees go, I would guess it was on the weaker end. I used a little over a 1/2 cup.

Ze batterrr:

For the frosting, the recipe had some caramel frosting made with melted caramels, but I went with my most favorite icing EVARR, the salty caramel one from Sprinklebakes. What can I say, I like making my own caramel sauce?

As I was getting ready to caramelize the sugar, a lightbulb went off in my head, to perhaps use the leftover coffee in place of plain water. Genius, no?? No. For two reasons:
1- regular water is clear, and the mixture turns brown after caramelizing- the key to knowing when it’s done. Coffee/sugar mixtures are unfortunately already brown, thus eliminating the necessary color gauging aspect.
2- Perhaps this was due to the lack of color change and subsequent possible burning of the liquid, but the coffee did not seem to hold up well to intense reduction. In other words, it did not smell very good as the attempt went on. So, I don’t recommend embarking on this particular journey into mad science.

So I just whipped up a batch of standard recipe-guided frosting. Turns out, the above cupcake recipe yields a whopping 36 cupcakes, so I ran out of frosting after the first 15 or 16. Not a big deal, just make some more, duh…. except I had also run out of heavy cream, the cardinal ingredient in turning the sugar liquid to caramel. I had about 1.5 tbsp left, and nothing more.

Except egg nog.

Since I’d already crashed and burned once, what’s another failed experiment? So I subbed another 3 tbsp of egg nog for heavy cream and prayed to the baking gods that I’d found a loophole…….

And it worked!

Not only did it make a flawless sauce, it added a Christmasy egg nog-gy flavor to the frosting. Thank goodness for egg nog…

&& God bless us everyone!

The Feisty Baker decorates cookies Pt. 2

This is the frosting/decorating edition of my previous entry.

Unfortunately, because I am the scatterbrained, forgetful snicklefritz that I am, I of course documented every single step of the baking process, and none of the decorating process.

Fail #1. Just shameful.

The reason I am writing this is to show the recipe I used, and an alternative Royal icing one that is completely different. And to explain when to use each, depending on what you’re trying to accomplish.

As I said before, I originally planned to decorate with my BFF, using royal icing and piping the icing on the cookies, then “flooding” them to make a smooth, even, sophisticated-looking cookie. To do this you definitely need piping bags, a squeeze bottle or two, and meringue powder. The meringue powder is key to making the icing fluffy.

Being that I didn’t know a thing about decorating with royal icing, I researched a place with a good explanation of the steps, equipment and recipe for icing.

And now to your left, you will see absolutely nothing because I never actually went this route. By the time I got around to decorating, I really just wanted slap on some colored buttercream and bedazzle it with sprinkles.

What I did do, was make up a simple batch of buttercream and divided it into bowls, and using Wilton frosting coloring, colored each bowl a different color for the cookies. However, I didn’t save any plain, uncolored frosting to use for white………

FAIL #2.

So my mom and I had fun decorating and in the end the cookies looked exactly like Christmas cookies, after maybe 1 or 2 hits of acid- purple Christmas tree, red snowman, star colored in USA colors (red and white sprinkles).

Needless to say…..

…good times were had and fond memories were made.

***EDIT: As a last resort I was going to document the leftover cookies that we set up to let  my little cousins decorate, however before I could snap a picture, this creature:


snuck in somehow and licked the frosting off of almost every cookie.

FAIL #3.


Thanksgiving Pecan Pie Cupcakes

I’m not really a fan of pumpkin pie. The gloppy, sticky texture is weird to me, and it’s not even all that sweet. I’m a pecan pie woman, and to my knowledge, I’ve never met a pecan pie I didn’t like. I know pecan pie also has that gloppy glaze in it too, but its chocked full of pecans to fill in the missing crunchy element for me that is lacking in a pumpkin pie.

This Thanksgiving I wanted to try out a cupcake that paid homage to my favorite pie. It was breaking tradition a bit, so I wanted to also make something that didn’t necessarily make people miss the actual pie itself.

I wanted the cupcake to have a “filled” quality to it, and most of the recipes I found were a brown sugar cake with a brown butter-ish frosting. That just screams WAYTOOSWEET to me… and if you’ve experienced the sweetness level of some of my stuff, that is saying something. The best recipe I went with had a brown sugar based cake with a chocolate bourbon pecan “curd” (I use quotes because it wasn’t as thick as a curd, but thicker than a sauce). In contrast to the other recipes that piled on an additional sickeningly sweet frosting, this version keeps it simple and tops it with the only acceptable pecan pie-anything topping…. homemade whipped cream. After making this whipped cream, I basically want to put it on any and every thing I eat.  It’s super light and fluffy and just a hint of sweetness. Not to mention really easy.

Note: As I write this, it’s been a good 3-4 weeks since I made these, but I seem to recall having an over-abundance of whipped cream left over after frosting all the cakes. Perhaps I might suggest to only use 1/4-1/3 of a cup of heavy cream, rather a whole half of a cup and then having to waste it, as it doesn’t keep well for more than a day or so. You can always make more 🙂

Mmkay, enough yapping, here’s how it turned out:

Catching up…

I’ve said before that I am in veterinary school. I started this blog on a study break a few months ago, and unfortunately, school really started snowballing shortly after and I haven’t been able to sit down and write on here. Enter winter break 🙂

Back in late October, I was feeling especially fall-y and wanted to bake something that incorporated fall flavors (pumpkin, apple, etc.) but that also included some kind of liquor. None of my regular blogs had any recipes that stood out to me, so I scoured the innernetz for something I could work with.

I came upon this pumpkin-maple-rum recipe, which is basically the embodiment of the fall season, but, in true Feisty Baker fashion, I only liked the cake part. I envisioned an apple-flavored frosting, but strangely enough apple buttercream recipes are few and far between. Not to mention, apple by itself is a difficult flavor to highlight in frosting. Or a  cake for that matter. I decided that an “apple butter” would give the apple-flavor the backbone it needed to stand out.

Firstly, not all buttercreams are created equal. If you’re not familiar with different types, there is basic buttercream with a butter + powered sugar base, French buttercream which is yolk-based, Italian meringue buttercream made with hot syrup,  and Swiss meringue made with egg whites. Meringue buttercreams are a bit tricky due to the time required to prepare and whip the sugared egg whites prior to adding them to the butter mixture, and the panic that comes during the midpoint of mixing when the contents start to separate out. To save time, I will direct you to a site, complete with pictures, giving step by step directions and descriptions of the meringue buttercream making process. Familiarize yourself with it all before attempting this frosting. Anyways, on to the recipe (adapted from Sweet Revelations):

Apple Butter Swiss Meringue Buttercream

  • 2 cups unsalted butter cubed, at room temperature
  • 5 large egg whites
  • 1 cup + 2 tbsp of sugar
  • 1 teaspoon pure vanilla extract or 1 vanilla bean
  • pinch of salt
  • 1 cup (or more if you want) of apple butter

1.  Using a double boiler, or just a sauce pan filled with two inches of water,  bring the water to a boil, then reduce heat to med-low so water continues to simmer. If you don’t have a double boiler, make sure the pan is large enough to fit either the mixing bowl from the stand mixer or a several-quart heat-proof bowl.

2.  In your mixer bowl, hand whisk the egg whites and the sugar just until combined.  Place over simmering pot and whisk for approx 4 mins until the egg whites are hot (about 150 degrees).  The sugar should be dissolved by this time as well.  Place bowl on stand mixer and attach the whisk attachment.  Whisk egg whites on medium speed for about 2-3 minutes, then increase speed to high. Whisk until mixture forms stiff peaks, such as this:

The peaks should stay after you’ve taken the beater out of the mixture.

It will take at least 10 minutes to get the mixture to this state!

***This whole process can also be accomplished with a regular hand mixer, rather than a stand mixer***

3.  Remove whisk attachment and replace with paddle attachment.  Beat on low-speed until mixture is completely cooled.  Increase speed to medium and add butter pieces ONE AT A TIME. If you add too fast, mixture will separate out prematurely.  Scrape the bowl and continue to beat until buttercream is glossy, smooth and thick.  It may separate at first, but continue beating and it will emulsify.  Add vanilla flavouring, a pinch of salt. On a low speed, add in apple butter and beat until combined.

With their powers combined, the two recipes become…..

The Feisty Baker bakes cookies Pt. 1

Warning: not a cupcake post. Please don’t let that deter you, however.

Among other similarities that have drawn us together, my best friend and I share a common love for baking and are both avid bakers. She is more of a diverse baker than I am, and makes many different kinds of things, while I have chosen to hone my skills solely making cupcakes. Most people give store-bought birthday presents, we exchange sweets. I crank out my best recipes, in exchange for her amazing oreo balls or insane pumpkin roll (seriously, it’s to die for).

This year, I decided to embark on a cookie making and decorating journey, and enlisted her to help me. Unfortunately, because vet school is ridiculous (8 tests in the last 2 weeks), we didn’t make it to the decorating part…. but we had a pretty rad holiday pancake dinner at IHOP to make up for it. I also ended up with THE best cookie recipe EVER. 

Another SprinkleBakes find, I think she actually took it from another website as well. Either way, if you’re looking for a cookie that stands up to decorating, this recipe will deliver! Furthermore, I have made homemade cookies maaaaaybe twice in my life, so my experience in that department was limited.

The trick that made me realize why my previous cookie attempts ended up too thin and overcooked, was to roll out the dough to 1/4-1/2 inch thick.

Ordinarily I would pound it out to a nothing and bake, but this thickness yields sturdy cookies that can be subjected to a lot of things without breaking (transportation, movement, 2 and 4 year olds decorating them). If you’re curious, I used the Wilton 9-piece cookie cutter set.


The baking part was trial and error. The first batch I made were the most done, mostly because I was working off of previous experience and rolled the dough too thin… so even a 7-8 minute cooking time rendered crispy edges:


The subsequent batches were much prettier. Not to mention delicious.


In all I estimate that all the dough made about 40 cookies. Since this post is exceptionally long, I will divide up the frosting part into another post. That way you’ll have to keep reading my other blog posts to find it 😉

me + caramel = <333

Before I go any further into this post, I need to lay this out there:

I. Love. Caramel.

Always have, always will.

When I was little and we would go to the grocery store, they had a candy stand where you could select various candies and put them in a bag for $X/per pound, or for 5 cents a piece, you could just get a few pieces of candy. I, of course, only ever wanted the caramel. Every time we went to the grocery store, I would ask my dad for some change to put in the little tin box to get a few caramel pieces. Usually he just gace me a nickel or a dime, but if I was lucky, he would break out a quarter. Mind you, I had to tell him how many pieces I could get with $0.25, but once I conquered the math challenge, I was rewarded with FIVE WHOLE CARAMELS! If only life was still that simple yet exponentially rewarding…

Another one of my favorite baking blogs is Sprinkle Bakes. I found this recipe for triple salted caramel cupcakes and admittedly I was quite intimidated by it. I had been baking for some time, and had started to venture out into the world of filled cupcakes, pastry creams and gum pastes, but for some reason the thought of making my own caramel really scared the crap out of me…. I just wasn’t ready to try it out yet.

Over the next few weeks, I mulled it over, going back and forth to the recipe, googling other similar recipes to see other people’s blunders they might have been willing to share over the internet. Finally, I decided I was going to make them as a birthday present to my best friend. I figured having something special to make them FOR helps to up the ante and make sure I am extra careful (so that I don’t have to re-do anything over again!).

FIRST OF ALL, let me say……. OH… MY… GOD. These little wonders are basically what I imagine the clouds in heaven tasting like. The saltiness mixewd with the sweet and buttery caramel is the best thing I’ve ever had. I don’t ordinarily eat my cupcakes, however I ate four of these. Four. The caramel, as the website with the recipe says, can truly go from delicious to burnt in about 0.03 seconds. In my case, I over did it a bit on my first try and the caramel had a “toasted marshmallow” flavor to it… luckily, the fact that it is incorporated into the frosting and absorbs into the cupcake as filling helped to mask my over-cooking. I made these a second time a few days later and nailed the sauce and filling perfectly, which, in retrospect, really just made it harder for me not to eat the leftover caramel by itself.

I filled the cupcakes initially to the brim and then put back in the part I had carved out:

When I made them a second time, I filled the cupcakes, and then waited a bit while they soaked in the cake some, and then topped them off again. It worked well and didn’t drench them or make the cake too soggy (as I hypothesized might happen, but I took the chance anyway ;P).

&&&& The finished product, topped with bits of sea salt: